How to Setup SAML-P SSO using ADFS
VIDIZMO supports Single Sign-On (SSO) using the SAML-P protocol with Active Directory Federation Services (ADFS), allowing users to sign in with their Active Directory credentials.
To learn more about SSO, see Understanding Single Sign-On.
Prerequisites
- Ensure you belong to a group where the Management of SSO + SCIM permission is enabled.
- Your VIDIZMO Portal must be configured to use HTTPS. See How to Configure your Portal to use HTTPS only.
- You must have access to an ADFS server (AD FS 3.0 on Windows Server 2012 R2 or later).
Configuration on ADFS Server
Add VIDIZMO as a Relying Party Trust
- Open AD FS Management on your local server.
- Go to Trust Relationships > Relying Party Trusts and select Add Relying Party Trust. This starts the Add Relying Party Trust Wizard.
- On the Welcome page, select Start.
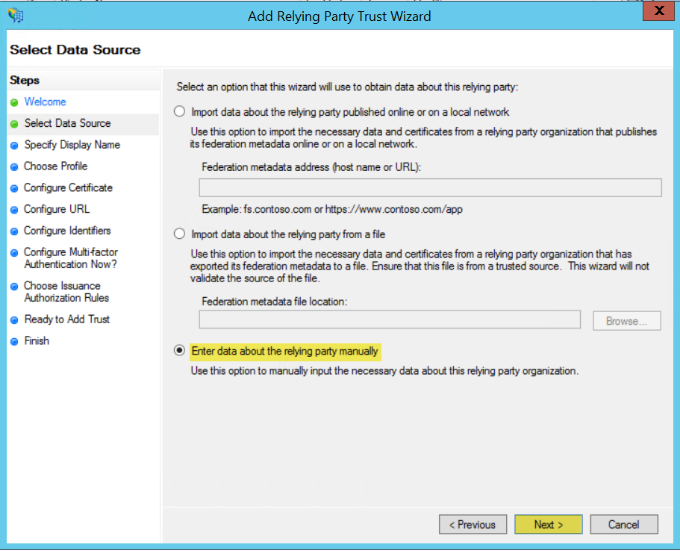
- On the Select Data Source page, select Enter data about the relying party manually and select Next.
- Enter a Display Name (for example, "VIDIZMO SAML SSO") and an optional description. Select Next.
- Select AD FS profile and select Next.
- On the Configure Certificate page, select Next (no certificate configuration is needed at this step).
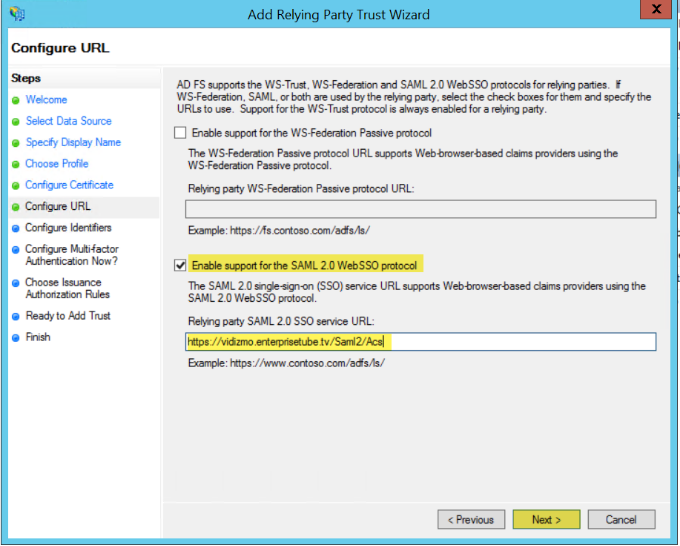
- On the Configure URL page, select Enable support for the SAML 2.0 WebSSO protocol and enter your VIDIZMO Portal URL with
/Saml2/Acsappended in the Relying party SAML 2.0 SSO service URL field (for example,https://yourportal.vidizmo.com/Saml2/Acs). Select Next.
NOTE: The path
/Saml2/Acsis case sensitive and must be entered exactly as shown.
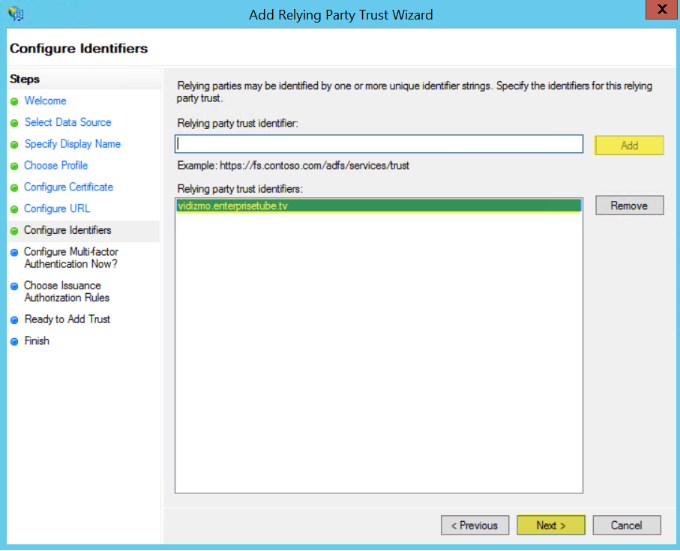
- On the Configure Identifiers page, add your VIDIZMO Portal URL as the Relying party trust identifier and select Add. Select Next.
- On the Configure Multi-factor Authentication page, select I do not want to configure multi-factor authentication settings for this relying party trust at this time. Select Next.
- On the Choose Issuance Authorization Rules page, select Permit all users to access this relying party. Select Next.
- On the Ready to Add Trust page, review your settings and select Next.
- On the Finish page, select Open the Edit Claim Rules dialog for this relying party trust when the wizard closes and select Close.
Configure Claim Rules
If the Edit Claim Rules dialog did not open automatically, right-click your Relying Party Trust display name and select Edit Claim Rules.
Rule 1: Send LDAP Attributes as Claims
- Select Add Rule.
- From the Claim rule template dropdown, select Send LDAP Attributes as Claims and select Next.
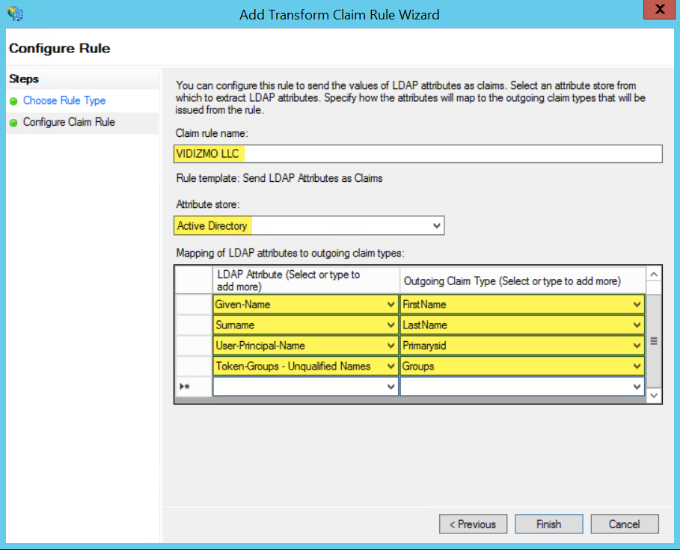
- Enter a Claim Rule Name, select Active Directory as the Attribute Store, and configure the following LDAP attribute mappings:
| LDAP Attribute | Outgoing Claim Type |
|---|---|
| E-Mail-Addresses | EmailAddress |
| Given-Name | FirstName |
| Surname | LastName |
| User-Principal-Name | Primarysid |
| Token-Groups – Unqualified Names | Groups |
- Select Finish.
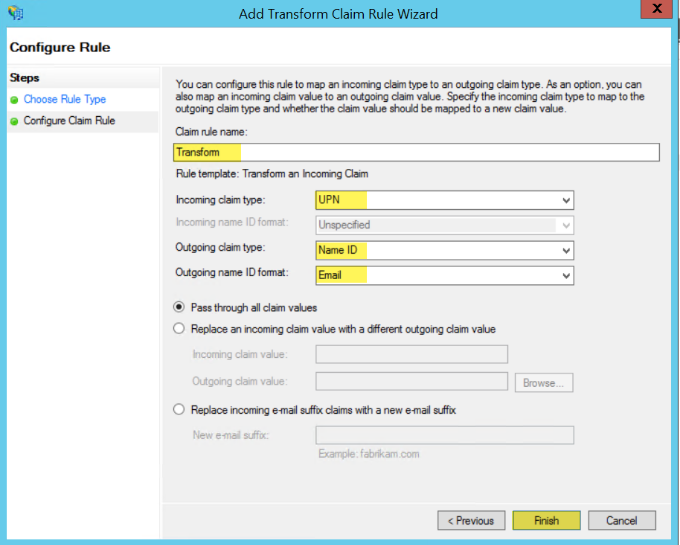
Rule 2: Transform an Incoming Claim
- Select Add Rule.
- From the Claim rule template dropdown, select Transform an Incoming Claim and select Next.
- Configure the following:
- Claim rule name Enter a name (for example, "Transform").
- Incoming claim type UPN (User Principal Name).
- Outgoing claim type Name ID.
- Outgoing name ID format Email.
- Select Finish.
- With both rules added, select Apply.
Obtain ADFS URLs for VIDIZMO Configuration
After completing the ADFS configuration, you need three URLs for the VIDIZMO configuration:
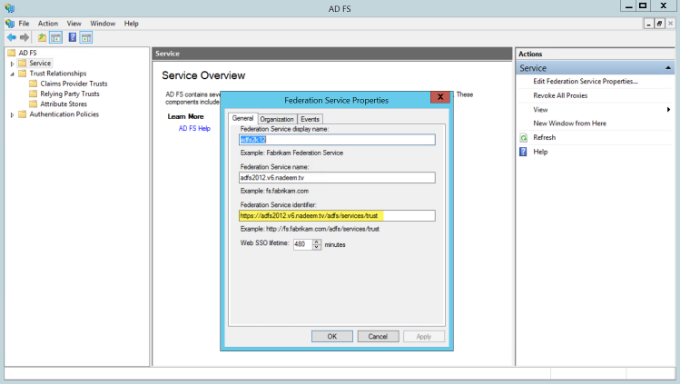
SAML Issuer
- In AD FS Management, right-click Service and select Edit Federation Service Properties.
- Copy the Federation Service Identifier. This URL is in the format
https://[ADFSDomain]/adfs/services/trust.
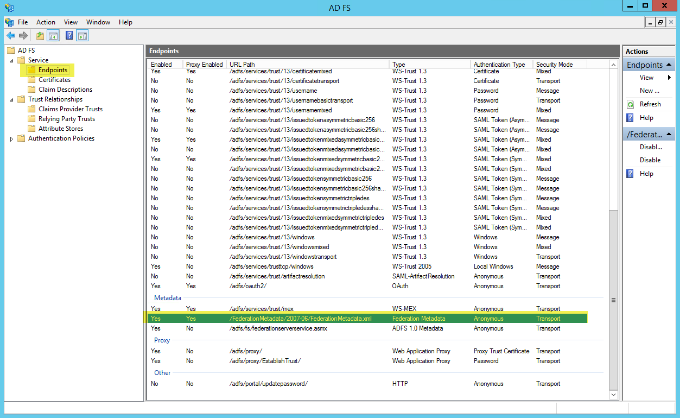
Meta Address
- In AD FS Management, select Endpoints. In the Metadata section, copy the Federation Metadata URL. This URL is in the format
https://[ADFSDomain]/FederationMetadata/2007-06/FederationMetadata.xml.
Portal Identity
- In AD FS Management, select Relying Party Trusts and find the trust you just created. The Identifier column shows your Portal URL (for example,
https://yourportal.vidizmo.com).
URL Summary
- SAML Issuer:
https://[ADFSDomain]/adfs/services/trust - Meta Address:
https://[ADFSDomain]/FederationMetadata/2007-06/FederationMetadata.xml - Portal Identity: Your VIDIZMO Portal URL
Configuration in VIDIZMO
- In VIDIZMO, select the menu icon in the top-left corner to open the navigation pane.
- Expand the Admin section and select Portal Settings.
- Go to Apps > Single Sign-On.
- Select the settings icon on the SAMLP SSO app.
- In the settings dialog, enter the following:
- SAML Issuer The Federation Service Identifier from your ADFS server.
- Meta Address The Federation Metadata URL from your ADFS server.
- Portal Identity Your VIDIZMO Portal URL, matching the Relying Party Trust Identifier configured in ADFS.
- SSO Login Message A custom message displayed on the sign-in page for this SSO option.
- SSO Login Button Label A custom label for the SAML sign-in button on the sign-in page.
- Callback Path
Pre-configured to
/Saml2/Acs. - Force Login Select this option to redirect users directly to the ADFS sign-in page. When unchecked, users sign in through your Portal's sign-in screen.
- Attribute Mapping Map your ADFS attributes (FirstName, LastName, EmailAddress, ExternalSystemId) to your VIDIZMO Portal. You can also add new attribute mappings if needed.
- CAL Select a Client Access License to assign to users who sign in through SAML-P SSO. When a user enters the Portal via SAML-P SSO, this CAL is assigned to them, granting the permissions associated with that CAL.
- Select Save Changes to apply your settings.
- Turn on the toggle for the SAMLP SSO app to enable SSO.
Result
Navigate to your Portal's sign-in screen. You will see an option to Sign in with SAML SSO. Selecting it redirects you to the ADFS sign-in page where you can enter your Active Directory credentials.